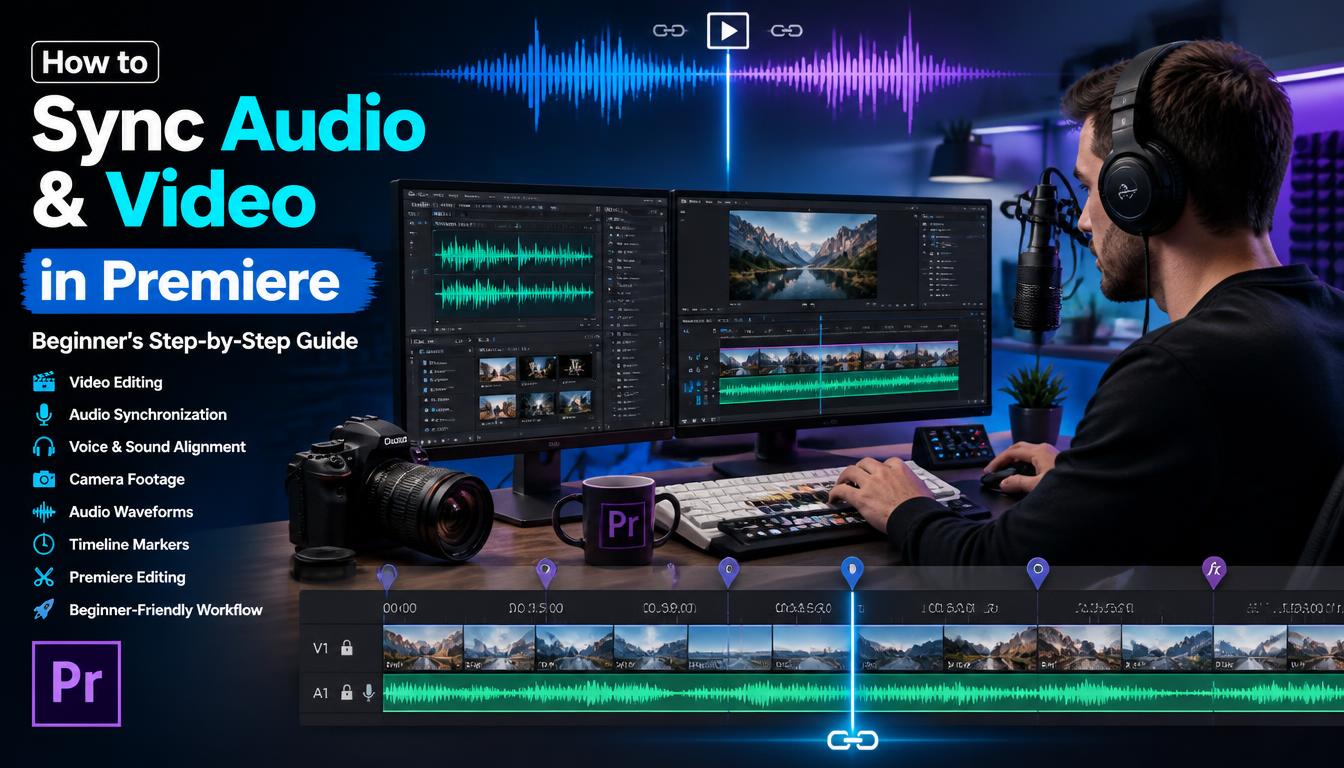
Have you ever imported your footage into Adobe Premiere Pro only to realize the audio and video don’t match? Maybe the lips move before the words, or you’re using high-quality audio recorded on a separate microphone. It can feel frustrating, especially if you’re new to video editing.
The good news is that learning how to sync audio and video in Premiere is much easier than most beginners think. Adobe Premiere Pro includes built-in tools that can automatically align audio tracks in seconds. And if automatic syncing doesn’t work, you can also sync clips manually with just a few simple steps.
Whether you’re editing YouTube videos, interviews, podcasts, short films, or social media content, knowing how to synchronize audio and video is an essential skill. It not only improves your video’s quality but also makes your editing workflow much faster. In this guide, you’ll learn several ways to sync audio and video in Premiere Pro, when to use each method, and how to fix common syncing problems.
Before learning the solution, it’s helpful to understand why this problem happens in the first place. Audio and video can become unsynchronized for several reasons:
This is common for YouTubers, filmmakers, podcasters, and content creators. Fortunately, Premiere Pro offers several tools to solve these issues quickly.
Many new editors focus on video quality but overlook audio synchronization. However, viewers notice poor audio almost immediately. When audio is perfectly synced, your videos look more professional because:
Even a small delay of a fraction of a second can make your video feel awkward. Spending a few minutes syncing your clips correctly can dramatically improve the final result.
You’ve finished recording your video, but the camera audio sounds poor while your external microphone sounds amazing. Unfortunately, they don’t line up.
Trying to edit without proper synchronization can waste hours. Dialogue won’t match the speaker’s lips, cuts become difficult, and your final video may look unprofessional. Many beginners even think they need expensive software to fix it.
The good news is that Adobe Premiere Pro already includes powerful audio synchronization tools. In most cases, you can sync audio and video automatically with just a few clicks. If that doesn’t work, Premiere also provides simple manual methods that are accurate and easy to learn.
For most editors, this is the fastest and easiest method. Premiere Pro compares the audio waveforms from both clips and automatically aligns them. This works especially well when both recordings capture the same sounds, even if one recording has much better quality.
Start by importing both files into your project.
Typically, you’ll have:
Drag both files into your Project panel.
Drag the video clip onto the timeline first. Next, place the external audio directly underneath it on another audio track.
Don’t worry if they don’t line up perfectly yet.
Hold Shift and click both the video clip and the external audio clip.
Both clips should now be highlighted.
Right-click on the selected clips.
From the menu, click Synchronize.
A dialog box will appear with several synchronization options.
Choose Audio as the synchronization method.
Premiere Pro will compare the waveforms from both recordings and automatically align them.
Click OK.
In just a few seconds, your clips should be perfectly synchronized.
Play the timeline.
Watch the speaker’s lips carefully while listening to the dialogue.
If everything looks natural, the synchronization was successful.
You can now mute or delete the camera’s original audio if you’re using the higher-quality external recording.
Automatic synchronization works best when:
For most creators, this method saves a significant amount of editing time while delivering highly accurate results.
Although Premiere Pro’s synchronization feature is powerful, it isn’t perfect.
Automatic syncing may struggle if:
Don’t worry if this happens. Premiere Pro also lets you align clips manually with excellent precision.
Sometimes, Premiere Pro’s automatic sync feature may not work as expected. This can happen if the camera audio is too noisy, the clips are very short, or the recordings don’t share enough matching sound. In these situations, manual syncing gives you complete control.
The process may seem difficult at first, but once you understand it, it’s surprisingly simple.
Place your video clip on Video Track 1 and your external audio on Audio Track 2.
Zoom in on the timeline so you can clearly see the audio waveforms.
Look for a sound that appears in both recordings. This could be:
These sounds create sharp waveform peaks, making them easy to match.
Click and drag the external audio until its waveform lines up with the matching waveform from the camera audio.
Take your time. Even a tiny adjustment can make a big difference.
Play the timeline and watch the speaker’s lips.
If the dialogue feels slightly early or late, move the audio one frame at a time until everything looks natural.
Once you’re happy with the sync, mute or unlink and delete the camera’s original audio if you don’t need it.
Your project will now use the cleaner external recording.
If you want Premiere Pro to treat your video and external audio as a single file, Merge Clips is a great option. This is especially useful when you’re working with interviews, tutorials, or projects with many separate recordings.
How to Merge Clips:
Premiere Pro creates a new merged clip that combines the video with the synced audio. Now you can edit it like any normal video clip without worrying about keeping separate files aligned.
Both methods are useful. Automatic syncing saves time, while manual syncing gives you more precision when needed.
The best method depends on your project.
Choose Automatic Sync if:
Choose Manual Sync if:
Choose Merge Clips if:
Even experienced editors make mistakes from time to time. Here are some common ones to watch out for.
Deleting Camera Audio Too Early
Keep the camera audio until you’ve confirmed that everything is perfectly synchronized.
Forgetting to Zoom In
Trying to sync while zoomed out makes it difficult to line up waveforms accurately.
Ignoring Small Delays
Even a delay of a few milliseconds can make speech look unnatural.
Always preview your timeline before exporting.
Recording Without Reference Audio
If the camera records no audio at all, automatic synchronization becomes much harder.
Always record some reference audio, even if you don’t plan to use it.
Not Listening with Headphones
Speakers may hide small sync problems.
Headphones make it much easier to detect tiny delays.
Yes. Premiere Pro can synchronize multiple clips, especially when editing interviews, events, or multicamera projects.
If all clips contain matching reference audio, you can select them together and use the Synchronize feature to save time.
For multicamera productions, Premiere Pro also includes dedicated multicam synchronization tools that automatically align footage from different cameras using audio waveforms.
Even after following the correct steps, you may occasionally run into syncing issues. Here are some common problems and how to fix them.
If the audio starts correctly but drifts over time, the issue is usually caused by different frame rates or audio sample rates. Make sure all your footage uses the same frame rate and that your audio is recorded at 48 kHz, which is the standard for video editing.
If Premiere Pro can’t synchronize your clips, check that both files contain clear reference audio. If the camera audio is too quiet or noisy, use the manual waveform method instead.
Zoom in on the timeline and adjust the audio by one or two frames until the dialogue matches the speaker’s lips. Small adjustments often make a big difference.
Ensure you’re using the synced external audio track rather than the original camera audio. Muting or removing the camera audio after confirming the sync can also prevent confusion.
Learning how to sync audio and video in Premiere is one of the most valuable skills for any video editor. Whether you’re creating YouTube videos, interviews, online courses, or short films, properly synchronized audio makes your content look more polished and professional.
For most projects, Premiere Pro’s Synchronize feature provides a fast and reliable solution. If automatic syncing doesn’t work, the manual waveform method and Merge Clips offer excellent alternatives that give you full control over your edits. By using the right technique for each project and following best practices, you can avoid common sync issues and speed up your editing workflow. The more you practice, the easier syncing becomes. Before long, you’ll be able to align audio and video in just a few minutes, allowing you to focus on creating engaging content instead of fixing technical problems.
The good news is that learning how to sync audio and video in Premiere is much easier than most beginners think. Adobe Premiere Pro includes built-in tools that can automatically align audio tracks in seconds. And if automatic syncing doesn’t work, you can also sync clips manually with just a few simple steps.
Whether you’re editing YouTube videos, interviews, podcasts, short films, or social media content, knowing how to synchronize audio and video is an essential skill. It not only improves your video’s quality but also makes your editing workflow much faster. In this guide, you’ll learn several ways to sync audio and video in Premiere Pro, when to use each method, and how to fix common syncing problems.
Table of Contents
- Why Audio and Video Go Out of Sync
- Why Proper Audio Sync Matters
- How Premiere Pro Syncs Audio Automatically
- Method 1: How to Sync Audio and Video in Premiere Using Synchronize
- Method 2: How to Sync Audio and Video Manually
- Method 3: Using Merge Clips
- Automatic vs Manual Sync Comparison
- Common Sync Problems and Fixes
- Pro Tips for Better Audio Sync
- Frequently Asked Questions
- Conclusion
Why Do Audio and Video Go Out of Sync?
Before learning the solution, it’s helpful to understand why this problem happens in the first place. Audio and video can become unsynchronized for several reasons:
- You recorded audio using an external microphone.
- Your camera captured lower-quality backup audio.
- Different devices recorded at slightly different speeds.
- The frame rate or sample rate doesn’t match.
- Files were imported incorrectly during editing.
This is common for YouTubers, filmmakers, podcasters, and content creators. Fortunately, Premiere Pro offers several tools to solve these issues quickly.
Why Proper Audio Sync Matters
Many new editors focus on video quality but overlook audio synchronization. However, viewers notice poor audio almost immediately. When audio is perfectly synced, your videos look more professional because:
- Dialogue matches lip movements.
- Interviews feel natural.
- Viewers stay engaged longer.
- Your content appears polished and trustworthy.
- Editing becomes much easier later in the project.
Even a small delay of a fraction of a second can make your video feel awkward. Spending a few minutes syncing your clips correctly can dramatically improve the final result.
PAS Framework
Problem
You’ve finished recording your video, but the camera audio sounds poor while your external microphone sounds amazing. Unfortunately, they don’t line up.
Agitate
Trying to edit without proper synchronization can waste hours. Dialogue won’t match the speaker’s lips, cuts become difficult, and your final video may look unprofessional. Many beginners even think they need expensive software to fix it.
Solution
The good news is that Adobe Premiere Pro already includes powerful audio synchronization tools. In most cases, you can sync audio and video automatically with just a few clicks. If that doesn’t work, Premiere also provides simple manual methods that are accurate and easy to learn.
Method 1: How to Sync Audio and Video in Premiere Using Synchronize
For most editors, this is the fastest and easiest method. Premiere Pro compares the audio waveforms from both clips and automatically aligns them. This works especially well when both recordings capture the same sounds, even if one recording has much better quality.
Step 1: Import Your Media
Start by importing both files into your project.
Typically, you’ll have:
- A video file from your camera
- An audio file from an external recorder
Drag both files into your Project panel.
Step 2: Place Both Clips on the Timeline
Drag the video clip onto the timeline first. Next, place the external audio directly underneath it on another audio track.
Don’t worry if they don’t line up perfectly yet.
Step 3: Select Both Clips
Hold Shift and click both the video clip and the external audio clip.
Both clips should now be highlighted.
Step 4: Choose Synchronize
Right-click on the selected clips.
From the menu, click Synchronize.
A dialog box will appear with several synchronization options.
Step 5: Select Audio
Choose Audio as the synchronization method.
Premiere Pro will compare the waveforms from both recordings and automatically align them.
Click OK.
In just a few seconds, your clips should be perfectly synchronized.
Step 6: Test the Results
Play the timeline.
Watch the speaker’s lips carefully while listening to the dialogue.
If everything looks natural, the synchronization was successful.
You can now mute or delete the camera’s original audio if you’re using the higher-quality external recording.
When Should You Use Automatic Sync?
Automatic synchronization works best when:
- Both devices recorded clear audio.
- You’re using external microphones.
- Interviews were recorded with multiple devices.
- Wedding videos include separate audio recorders.
- Podcasts include camera footage and dedicated microphones.
- YouTube videos use DSLR cameras with external recorders.
For most creators, this method saves a significant amount of editing time while delivering highly accurate results.
Why Automatic Sync Sometimes Doesn’t Work
Although Premiere Pro’s synchronization feature is powerful, it isn’t perfect.
Automatic syncing may struggle if:
- The camera audio is extremely noisy.
- One recording is missing important sounds.
- The audio starts too late.
- The clips are very short.
- Wind or background noise hides the waveform.
Don’t worry if this happens. Premiere Pro also lets you align clips manually with excellent precision.
Method 2: How to Sync Audio and Video Manually
Sometimes, Premiere Pro’s automatic sync feature may not work as expected. This can happen if the camera audio is too noisy, the clips are very short, or the recordings don’t share enough matching sound. In these situations, manual syncing gives you complete control.
The process may seem difficult at first, but once you understand it, it’s surprisingly simple.
Step 1: Add Both Clips to the Timeline
Place your video clip on Video Track 1 and your external audio on Audio Track 2.
Zoom in on the timeline so you can clearly see the audio waveforms.
Step 2: Find a Common Sound
Look for a sound that appears in both recordings. This could be:
- A hand clap
- A clapboard snap
- Someone saying the first word
- A door closing
- A loud tap or click
These sounds create sharp waveform peaks, making them easy to match.
Step 3: Align the Waveforms
Click and drag the external audio until its waveform lines up with the matching waveform from the camera audio.
Take your time. Even a tiny adjustment can make a big difference.
Step 4: Play and Fine-Tune
Play the timeline and watch the speaker’s lips.
If the dialogue feels slightly early or late, move the audio one frame at a time until everything looks natural.
Step 5: Disable the Camera Audio
Once you’re happy with the sync, mute or unlink and delete the camera’s original audio if you don’t need it.
Your project will now use the cleaner external recording.
Method 3: Using Merge Clips
If you want Premiere Pro to treat your video and external audio as a single file, Merge Clips is a great option. This is especially useful when you’re working with interviews, tutorials, or projects with many separate recordings.
How to Merge Clips:
- Select both the video and audio files in the Project panel.
- Right-click and choose Merge Clips.
- Select Audio as the synchronization method.
- Click OK.
Premiere Pro creates a new merged clip that combines the video with the synced audio. Now you can edit it like any normal video clip without worrying about keeping separate files aligned.
Automatic Sync vs. Manual Sync
| Feature | Automatic Sync | Manual Sync |
| Speed | Very fast | Slower |
| Ease of Use | Beginner-friendly | Requires practice |
| Accuracy | Excellent in most cases | Extremely accurate when done carefully |
| Best For | Interviews, YouTube videos, podcasts | Difficult recordings and noisy audio |
| Requires Matching Audio | Yes | No |
| Full User Control | Limited | Complete |
Which Method Should You Choose?
The best method depends on your project.
Choose Automatic Sync if:
- Your camera recorded usable audio.
- You want the quickest workflow.
- You’re editing interviews or YouTube videos.
- Both recordings captured the same sounds.
Choose Manual Sync if:
- Automatic syncing fails.
- The audio is noisy.
- You’re working with unusual recordings.
- You need frame-perfect accuracy.
Choose Merge Clips if:
- You want a cleaner editing workflow.
- You’re organizing a large project.
- You don’t want to manage separate audio files.
Common Audio Sync Mistakes to Avoid
Even experienced editors make mistakes from time to time. Here are some common ones to watch out for.
Deleting Camera Audio Too Early
Keep the camera audio until you’ve confirmed that everything is perfectly synchronized.
Forgetting to Zoom In
Trying to sync while zoomed out makes it difficult to line up waveforms accurately.
Ignoring Small Delays
Even a delay of a few milliseconds can make speech look unnatural.
Always preview your timeline before exporting.
Recording Without Reference Audio
If the camera records no audio at all, automatic synchronization becomes much harder.
Always record some reference audio, even if you don’t plan to use it.
Not Listening with Headphones
Speakers may hide small sync problems.
Headphones make it much easier to detect tiny delays.
Can You Sync Multiple Clips at Once?
Yes. Premiere Pro can synchronize multiple clips, especially when editing interviews, events, or multicamera projects.
If all clips contain matching reference audio, you can select them together and use the Synchronize feature to save time.
For multicamera productions, Premiere Pro also includes dedicated multicam synchronization tools that automatically align footage from different cameras using audio waveforms.
Troubleshooting Common Audio Sync Problems
Even after following the correct steps, you may occasionally run into syncing issues. Here are some common problems and how to fix them.
Audio Slowly Goes Out of Sync
If the audio starts correctly but drifts over time, the issue is usually caused by different frame rates or audio sample rates. Make sure all your footage uses the same frame rate and that your audio is recorded at 48 kHz, which is the standard for video editing.
Automatic Sync Doesn’t Work
If Premiere Pro can’t synchronize your clips, check that both files contain clear reference audio. If the camera audio is too quiet or noisy, use the manual waveform method instead.
Lip Movements Don’t Match
Zoom in on the timeline and adjust the audio by one or two frames until the dialogue matches the speaker’s lips. Small adjustments often make a big difference.
External Audio Sounds Delayed
Ensure you’re using the synced external audio track rather than the original camera audio. Muting or removing the camera audio after confirming the sync can also prevent confusion.
Frequently Asked Questions
1. What is the easiest way to sync audio and video in Premiere?
The easiest method is the Synchronize feature. Premiere Pro compares audio waveforms and automatically aligns the clips in just a few seconds.2. Can Premiere Pro sync audio automatically?
Yes. Premiere Pro has a built-in synchronization tool that matches audio waveforms from different recordings.3. Why won’t Premiere Pro sync my clips?
Automatic sync may fail if the audio is too noisy, too short, or doesn’t contain enough matching sound. In these cases, manual syncing is the best option.4. Should I delete the camera audio after syncing?
Only after you’ve confirmed that the external audio is perfectly synchronized. It’s a good idea to keep the original audio until you’re sure everything is correct.5. What is the difference between Synchronize and Merge Clips?
Synchronize aligns clips on the timeline, while Merge Clips creates a new clip that permanently combines the video and synced audio.6. Can I sync multiple cameras using Premiere Pro?
Yes. Premiere Pro supports multicamera editing and can synchronize footage from multiple cameras using matching audio.7. Does Premiere Pro work with external microphones?
Absolutely. It’s commonly used to sync audio from microphones, audio recorders, and wireless recording systems.8. How can I prevent audio sync problems while recording?
Record reference audio on your camera, use the same frame rate across all devices, record audio at 48 kHz, and clap your hands at the beginning of each take to create a clear sync point.9. Is manual syncing more accurate than automatic syncing?
Manual syncing can be more precise in challenging situations, but Premiere Pro’s automatic sync is accurate enough for most projects.10. Can beginners learn to sync audio in Premiere Pro?
Yes. With a little practice, even beginners can master both automatic and manual syncing methods and significantly improve the quality of their videos.Conclusion
Learning how to sync audio and video in Premiere is one of the most valuable skills for any video editor. Whether you’re creating YouTube videos, interviews, online courses, or short films, properly synchronized audio makes your content look more polished and professional.
For most projects, Premiere Pro’s Synchronize feature provides a fast and reliable solution. If automatic syncing doesn’t work, the manual waveform method and Merge Clips offer excellent alternatives that give you full control over your edits. By using the right technique for each project and following best practices, you can avoid common sync issues and speed up your editing workflow. The more you practice, the easier syncing becomes. Before long, you’ll be able to align audio and video in just a few minutes, allowing you to focus on creating engaging content instead of fixing technical problems.